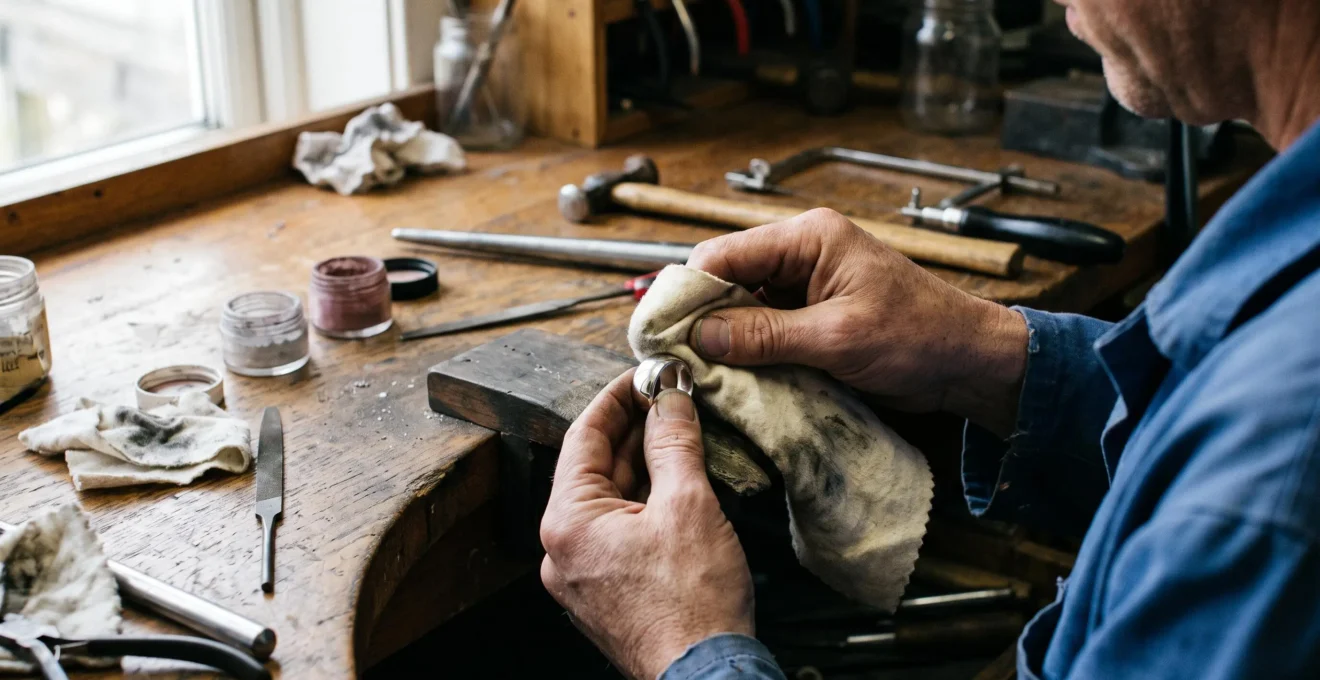
A professionally polished silver ring can lose its crisp reflections long before it develops obvious black tarnish. Fine scratches, fingerprints, polishing residue and repeated contact with other jewellery gradually soften the mirror-like appearance. Restoring that finish aggressively every time it looks slightly dull can shorten the useful life of the piece.
Maintaining showroom polish means preserving the existing surface rather than repeatedly recreating it. Gentle cleaning, limited use of suitable polishing compounds, controlled cloth movements and protective storage help retain brightness without unnecessary metal removal. The right intervention depends on whether the problem is surface contamination, tarnish, superficial marks or scratches that genuinely require corrective polishing.
These principles apply primarily to solid silver and sterling silver with polished surfaces. Silver-plated objects, intentionally oxidised finishes, antique pieces and jewellery containing delicate gemstones need additional precautions. The aim is not to make every item look newly manufactured, but to maintain its intended finish between professional assessments.
Keeping Silver at Showroom Standard: The Essentials
- Clean before polishing and choose the least abrasive method capable of addressing the visible problem.
- Use controlled, overlapping movements and reserve powered buffing or significant scratch correction for qualified professionals.
- Store pieces separately in suitable anti-tarnish materials to reduce scratches, tarnish and unnecessary future polishing.
- Why Different Polishing Compounds Remove Different Depths of Surface Metal
- How Professional Buffing Motions Differ From Amateur Circular Rubbing
- Rotary Buffing Tools vs Hand Polishing: Speed vs Safety for High Polish
- When to Re-Polish Silver: Balancing Aesthetics Against Metal Thickness Loss
- How to Protect High-Polish Surfaces From Microscratches During Storage
- How Professional Jewellers Achieve Glass-Like Mirror Reflectivity
- Why Commercial Silver Polishes Often Dull Mirror Finishes Instead of Enhancing Them
- How to Achieve Jeweller-Quality Mirror Finish on Silver at Home
Why Different Polishing Compounds Remove Different Depths of Surface Metal
Silver polishing compounds differ in abrasive composition, particle characteristics and cutting action. Coarser compounds remove surface irregularities more readily, while finer finishing compounds refine smaller marks and improve lustre. The finest effective compound is generally preferable for maintaining an existing mirror finish, because unnecessary cutting removes silver along with the imperfections being corrected.
Professional jewellery finishing traditionally distinguishes cutting compounds from finishing compounds. Brown Tripoli is commonly used for preliminary scratch reduction, white diamond compound may serve as an intermediate stage, and red jeweller’s rouge is associated with fine final polishing. These are typical functions rather than universal specifications: manufacturers can use different abrasive formulations under similar product names.
The distinction matters because a silver surface that is already highly reflective usually does not need the corrective action of a coarse compound. Starting with Tripoli simply because it appears in professional polishing kits may remove more material than the maintenance task requires.
| Compound | Typical action | Appropriate use |
|---|---|---|
| Brown Tripoli | Relatively strong cutting and preliminary smoothing | Corrective preparation of suitable solid silver by an experienced operator |
| White diamond compound | Intermediate refinement, depending on formulation | Reducing remaining fine marks before finishing |
| Red jeweller’s rouge | Fine finishing and lustre enhancement | Final refinement of appropriately prepared solid metal |
| Silver polishing cloth | Gentle abrasive cleaning, depending on treatment and pressure | Occasional removal of light tarnish from compatible finishes |
The distinctions are described in Ganoksin’s technical overview of buffing and polishing materials. The reference also distinguishes white diamond compound from white rouge, illustrating why colour alone is not a reliable measure of abrasiveness.
Finish type also changes the decision. Mirror-polished silver benefits from progressively finer surface refinement. Satin and textured finishes, however, should not automatically receive coarser compounds: abrasive polishing can erase their intentional surface pattern. Decorative recesses and plated surfaces introduce further risks.
Before using an unfamiliar compound, test it on an inconspicuous, structurally sound area of an appropriate solid-silver piece, such as the inside of a plain ring band. Clean the area first, follow the product instructions, apply minimal pressure and inspect the result under consistent lighting. Do not conduct this test on thin plating, valued patina or delicate decoration.
Remove polishing residue with a clean, suitable soft cloth. Where the piece’s construction permits washing, mild soap, water and a soft brush can help clean accessible crevices; rinse and dry thoroughly. Residue can obscure the finish or create conservation problems, although continuing abrasion after cleaning should not be assumed without evidence.
The compound should match the actual surface defect, not the desired degree of shine alone. Once abrasive strength is appropriate, polishing movement becomes the next factor determining surface uniformity.
How Professional Buffing Motions Differ From Amateur Circular Rubbing
Professional buffing differs from uncontrolled rubbing through movement, pressure and surface coverage. Jewellers continually move the workpiece across the buff and change direction to distribute cutting action and create a uniform finish. For hand maintenance, short, overlapping passes offer a manageable way to inspect progress, although circular hand movements are not inherently harmful in every situation.
The critical problem is repeated forceful abrasion of the same small area. Whether the movement is circular or linear, concentrating pressure in one location can produce uneven polishing, remove fine details and leave visible differences in surface reflection.
Professional rotary polishing commonly uses cross-buffing: the workpiece is moved in changing directions rather than held motionless. This helps the operator identify and refine directional marks. A home user can adapt the principle with controlled hand movements without attempting to reproduce powered-wheel pressure or speed.
For a plain polished silver surface, begin with a clean, compatible cloth. Make light overlapping passes along one direction, then examine the surface under angled light. If the finish and product instructions permit further polishing, change the working angle and repeat only where necessary. The directional approach is an inspection aid, not a rule that prohibits all circular motions.
Pressure should remain restrained. More force is not a substitute for an appropriate abrasive. Excessive pressure can increase unwanted cutting or deform vulnerable features, while ineffective contact may produce little improvement. The aim is consistent, gentle action rather than maximum force.
Directional marks can become easier to identify when the ring or bracelet is rotated under a window reflection. A sharp reflected edge exposes uneven areas more clearly than judging shine beneath a single bright overhead lamp.
Frequent rubbing should also be distinguished from proper maintenance. A clean, non-abrasive wipe to remove fingerprints is not equivalent to repeatedly treating a surface with abrasive paste. The first manages contamination; the second can progressively remove metal.
Consistent hand movements improve control, but they do not remove the hazards associated with powered polishing. Tool selection must therefore account for the construction of each piece, not just the appearance sought.
Rotary Buffing Tools vs Hand Polishing: Speed vs Safety for High Polish
Rotary polishing can refine suitable solid-silver surfaces efficiently, but its speed introduces hazards that gentle hand polishing largely avoids. Powered buffs may catch protruding components, remove detail rapidly and damage vulnerable jewellery. For maintaining an existing high polish at home, a compatible soft cloth is normally the more conservative choice, especially around settings, engraving and thin edges.
A professional polishing wheel can deliver rapid, uniform contact over accessible areas. That advantage also means an error develops quickly. Holding an object against the wheel too long may cut grooves, round details or change its shape. Jewellery can also be caught and pulled from the operator’s grip.
Flex-shaft attachments concentrate powered polishing in smaller areas. Their size does not eliminate the risks of excessive cutting, contact with settings or slipping against an adjacent surface. Handheld rotary kits should therefore not be treated as automatically safe simply because they are marketed for domestic use.
| Criterion | Professional rotary wheel | Flex-shaft attachment | Hand polishing |
|---|---|---|---|
| Working speed | Rapid on suitable accessible surfaces | Rapid, with concentrated local action | Slower, allowing closer inspection |
| Friction and heat concerns | Require careful speed, pressure and movement control | Localised friction requires particular attention | Usually easier to limit with gentle technique |
| Settings and thin edges | Risk of catching or excessive material removal | Risk of slipping or contacting vulnerable details | Greater control, but still requires care |
| Preferred role | Professional corrective finishing | Specialist targeted operations | Routine maintenance of compatible surfaces |
These are qualitative distinctions, not measured rankings of speed, temperature or metal removal. Equipment design, operator skill, workpiece geometry and abrasive choice all affect the outcome.
Ganoksin’s explanation of basic jewellery polishing technique describes the importance of continuous workpiece movement, appropriate pressure, separated finishing buffs and safe handling of rotary equipment.
For items with gemstones, material-specific care matters as much as metal finishing. Certain stones and treatments are sensitive to heat, chemicals or mechanical stress. Prongs, adhesives and delicate settings may also make an otherwise straightforward silver-polishing operation unsuitable.
Soft flannel and compatible jewellery polishing cloths provide a practical low-powered alternative. A small hand-held muslin buff can also be suitable when it is clean, used manually and appropriate for the surface. These methods can maintain lustre without implying that they will remove deep scratches or reproduce every professional finishing stage.
Leave powered correction of stone-set or structurally delicate pieces to an appropriately equipped professional. For valuable jewellery, confirming material and setting condition beforehand is preferable to experimenting with a rotary attachment.
Safe tools reduce unnecessary damage, but even gentle polishing should be performed only when required. Determining when the finish genuinely needs intervention is equally important.
When to Re-Polish Silver: Balancing Aesthetics Against Metal Thickness Loss
Silver should be re-polished according to its condition rather than on a fixed calendar schedule. Abrasive polishing removes tarnish and some underlying metal, so repeated corrective sessions gradually consume surface material. If a piece remains reflective and only carries removable fingerprints or light deposits, cleaning and protective storage are generally preferable to another full polish.
The distinction between maintenance and correction is fundamental. Gentle wiping removes contaminants without intentionally cutting metal. A treated silver polishing cloth provides mild abrasive action for suitable lightly tarnished surfaces. Corrective polishing uses stronger or repeated abrasion to reduce scratches and restore surface geometry.
According to the Canadian Conservation Institute guidance on silver care and tarnish removal, abrasive polishing removes both tarnish and silver while leaving fine surface scratches. The extent of the effect depends on the product and technique.
“Polishes are somewhat abrasive and, while they remove silver and tarnish from the surface of an object, they leave behind a pattern of fine scratches.”
Use observable changes to decide what action is justified:
- Fingerprints or superficial deposits: start with suitable gentle cleaning.
- Light tarnish: consider a compatible treated cloth after checking the finish and materials.
- Diffuse scratches or blurred reflections: assess whether professional refinement would materially improve the appearance.
- Deep scratches, deformation or damaged settings: seek professional evaluation instead of increasing abrasive pressure.
Thin ring shanks, engraved pieces, silver-plated objects and items with hallmarks deserve special restraint. A faded engraving or softened hallmark should not be treated as a surface blemish to polish away. Further abrasion can sacrifice details that cannot be recovered simply by restoring shine.
A useful inspection routine is to compare the same part of the object under daylight and a steady indoor light. If a clean surface still reflects edges sharply, there may be little justification for corrective polishing. If the reflection is disrupted by individual scratches, address the significance of those defects before attempting broad treatment.
No universal interval applies to every silver object. Wear, handling, storage, alloy, finish and previous polishing history all affect how quickly the appearance changes.
The best way to lengthen the interval between corrective polishing sessions is to prevent deterioration in the first place. Storage conditions have a direct role in preserving the existing finish.
How to Protect High-Polish Surfaces From Microscratches During Storage
Protecting a high-polish silver surface begins with preventing contact between jewellery, dust and unsuitable storage materials. Loose pieces can rub against each other, while particles caught between a polished surface and its container may cause fine scratches. Individual soft compartments or compatible anti-tarnish pouches reduce contact and help preserve reflectivity between uses.
Mirror-finished silver exposes very small surface marks because reflected light makes interruptions in the finish noticeable. Jewellery boxes containing mixed metal pieces, exposed clasps, chains and hard decorative fittings can create repeated opportunities for abrasion during handling or movement.
Store each polished item separately. A clean flannel-lined compartment or an appropriate anti-tarnish pouch offers a softer contact surface than a loose collection of jewellery. Fasten chains and position sharp clasps so they do not scrape against the polished portion of the same piece.
Storage must also limit tarnish. Silver reacts with sulfur-containing atmospheric compounds, producing silver sulfide. Higher humidity can contribute to unfavourable storage conditions, and sulfur-emitting materials such as some rubber products or unsuitable foams can promote deterioration.
Before storage, remove fingerprints and skin oils using a clean, suitable cloth. Residues can leave the piece looking cloudy and may contain substances that interact with vulnerable materials. Cleaning should remain gentle; fingerprints do not ordinarily justify aggressive polishing.
Where washing is appropriate, ensure the item is thoroughly dry before enclosing it. For moisture-sensitive storage environments, a suitable silica gel sachet may help manage humidity when used and maintained according to its instructions. Compatible anti-tarnish strips can provide an additional protective measure, but neither replaces clean storage or proper separation.
Avoid direct contact with rubber bands and unknown cushioning materials. Some cardboard products, adhesives and foams may also contain components unsuitable for long-term silver storage. For collectible or particularly valuable objects, conservation-grade storage materials offer a more controlled option.
Five Actions for Protecting a Showroom-Polished Silver Piece
- Inspect the surface: check the piece under angled light and identify whether it has fingerprints, tarnish or visible scratches. Deliverable: a clear decision on whether cleaning alone is sufficient.
- Clean gently: remove loose contamination with a compatible soft cloth, using mild cleaning only where the materials permit. Deliverable: a visibly clean surface without unnecessary corrective polishing.
- Check vulnerable details: examine settings, engravings, thin edges and decorative finishes before any abrasive treatment. Deliverable: confirmation that no obvious feature requires professional attention.
- Prepare protective storage: choose a clean individual pouch or lined compartment and remove unsuitable contact materials. Deliverable: one dedicated, contact-free storage space.
- Control the storage environment: dry the item thoroughly and use compatible moisture or tarnish-management materials where appropriate. Deliverable: a protected, dry piece stored separately from other jewellery.
Effective storage preserves the surface that professional polishing has already created. Understanding how that surface is produced also makes it easier to recognise which home-maintenance tasks are realistic.
How Professional Jewellers Achieve Glass-Like Mirror Reflectivity
Jewellers achieve mirror reflectivity by refining silver through successive finishing stages until the surface scatters less light and returns sharper reflections. Coarser operations address visible irregularities; finer abrasives reduce the marks left by earlier stages. Clean, dedicated buffs and controlled movement are essential because coarse abrasive contamination can compromise the final finish.
A bright surface is not necessarily a mirror-finished one. Under strong illumination, silver with numerous fine scratches may still look shiny. A true mirror finish becomes apparent when the metal returns a recognisable reflection with relatively clear edges.
A practical visual check is to position the polished area near a window or printed page and observe the reflected shapes. Flat and gently curved areas can reveal edge clarity; highly curved surfaces naturally distort reflections, so their optical behaviour should not be confused with poor workmanship.
Professional finishing traditionally proceeds through progressively finer abrasive actions. A preliminary cutting stage can reduce suitable scratches and pits, followed by intermediate refinement when needed and a final finishing compound intended to improve lustre.
Using one buff for every compound undermines this sequence. A cloth or wheel carrying coarse particles can introduce fresh scratches during the finishing stage. Professionals therefore keep cutting and finishing buffs separate and clean the workpiece between stages.
Buff materials also differ. Stitched muslin wheels are associated with firmer cutting operations, while softer loose buffs and flannel can serve final finishing. The specific choice depends on the workpiece and compound rather than a universal wheel sequence.
Cross-buffing helps achieve a uniform result because the operator changes working direction while maintaining controlled movement. A clean final flannel pass removes remaining surface film and helps expose the true quality of the finish.
At home, a carefully cleaned, largely undamaged solid-silver surface may regain excellent lustre through compatible fine hand polishing. However, deep marks, complex contours and geometrically uneven surfaces cannot always be corrected without professional equipment and controlled material removal.
Mirror reflectivity should be judged by reflection clarity, not brightness alone. If the piece requires extensive scratch removal to achieve that standard, the cost in lost metal may outweigh the aesthetic improvement.
Preserving a professionally refined surface also requires caution with products marketed for restoring shine. A tarnish remover may serve a different purpose from a fine finishing compound.
Why Commercial Silver Polishes Often Dull Mirror Finishes Instead of Enhancing Them
Some commercial silver polishes can reduce mirror clarity when their abrasive action, residues or treatment method are unsuitable for an already refined surface. Chemical dips primarily target tarnish, while abrasive creams remove material mechanically. Neither should be assumed to improve optical reflectivity simply because the packaging promises brighter silver.
Many polishing products are designed to remove tarnish efficiently from ordinary silver objects. That can be useful when the surface is discoloured, but an existing mirror finish presents a different maintenance objective: remove the contamination while preserving the established surface texture.
Abrasive creams can introduce fine scratches, particularly when products contain relatively aggressive particles, dry into abrasive agglomerates or are used with excessive pressure. A polished object may initially look brighter because tarnish has disappeared, while close inspection reveals a less sharply defined reflection.
Chemical dips work differently. They can remove tarnish from areas that are difficult to reach mechanically, including decorative recesses. This becomes a disadvantage when darkened areas form part of the intended design. Removing those contrasts may permanently change the appearance until the finish is professionally restored.
Some chemical tarnish-removal processes can also leave an appearance that requires additional gentle finishing. Inadequate rinsing may leave undesirable residues, although the effects depend on the formulation and object. It would be inaccurate to claim that every commercial dip or silver polish necessarily damages mirror-polished silver.
The conservative starting point is to identify the problem. Plain dirt and fingerprints generally call for cleaning, not a tarnish-removal chemical. Light tarnish on compatible solid silver may justify limited use of an appropriate treated cloth. Products with stronger chemical or abrasive action require a clearer reason for use.
Gemstone materials, plating, intentional oxidation, antique surfaces and assembled components can restrict suitable treatments further. Washing and immersion should never be presumed safe for every stone-set or composite item.
Avoid improvised abrasive mixtures simply because they are household products. An unverified combination may scratch silver, lodge particles in crevices or interfere with other materials in the piece.
Keeping the original finish intact is generally easier than correcting a surface altered by unnecessary treatment. A structured home routine brings together product choice, technique and inspection without relying on aggressive polishing.
Key Takeaways Before Your Next Polish
- Determine whether the loss of brightness comes from contamination, tarnish or actual scratches before choosing a treatment.
- Do not use professional cutting compounds merely to refresh an otherwise intact mirror finish.
- Judge the final result through reflection clarity and stop once the required improvement has been achieved.
How to Achieve Jeweller-Quality Mirror Finish on Silver at Home
Achieving a near-jeweller-quality finish at home requires careful assessment, compatible cleaning, minimal abrasive intervention and repeated visual checks. On a suitable solid-silver surface, controlled fine polishing can restore impressive reflectivity. Deep scratches, intricate decoration, fragile settings and substantial corrective work remain better suited to professional treatment because preserving the object matters more than forcing a perfect mirror finish.
Begin by identifying the material and existing finish. A plain solid-silver ring or gently curved bracelet offers a more straightforward maintenance surface than a plated pendant with textured details or a gemstone-set antique. The home procedure should become less aggressive, not more, as the piece becomes more delicate or complex.
Remove ordinary contamination before introducing polishing compounds. Use a clean, soft, lint-free cloth. If the construction and materials permit, mild soap and water can remove additional deposits, followed by careful rinsing and complete drying. Fragile gemstones, adhesives, antique finishes and other vulnerable components may require a different cleaning approach.
The Gemological Institute of America‘s jewellery care recommendations explain why gemstones and treatments need material-specific handling, particularly where heat, chemicals and mechanical cleaning are concerned.
After cleaning, inspect the surface in consistent daylight. If the reflections are already sharp, abrasive polishing may be unnecessary. If slight tarnish remains on an appropriate polished surface, use a compatible treated silver cloth conservatively, following its instructions and testing where suitable.
For an already refined solid-silver piece that genuinely needs minor additional polishing, select the finest appropriate finishing product. Keep each compound on a dedicated clean cloth. Work in controlled, overlapping passes, applying only the pressure necessary for the product to function. Inspect the effect frequently rather than repeating an entire session automatically.
More pronounced scratches require a different judgment. Removing them means lowering or reshaping surrounding surface material, not merely adding shine. If substantial cutting is necessary, professional polishing is preferable to experimenting with progressively stronger abrasives.
Finish by removing accessible compound residue using a clean cloth and, where safe, an appropriate gentle cleaning method. Examine crevices with a magnifier and use a suitable soft brush only when the object’s materials and structure permit. A residue-free surface makes it easier to judge the actual polish.
Perform quality control under at least two lighting conditions. A window reflection can reveal broad haziness; angled indoor illumination may make directional scratches easier to notice. Focus on the affected area rather than assuming every part of the object needs another pass.
If an isolated mark remains, first decide whether further material removal is justified. Stop if additional polishing could compromise an engraving, hallmark, plating, thin section or decorative detail. Not every imperfection needs correction, particularly on frequently worn or sentimental jewellery.
The final maintenance stage is storage. Once clean and fully dry, place the piece in an individual compatible pouch or lined compartment, away from harder objects and unsuitable materials. This protects the finishing work and reduces the need to repeat it.
Make the next action an inspection, not another polishing session. Check the silver under good light after cleaning, preserve the finish when reflections remain clear and arrange professional servicing when correction requires significant material removal or involves vulnerable details. That approach extends showroom-quality appearance while protecting the silver itself.
Can a silver polishing cloth gradually wear away silver?
Yes. Many treated silver polishing cloths contain mild abrasives, meaning repeated use can remove small amounts of surface material along with tarnish. Occasional gentle use on compatible solid silver is different from frequent forceful polishing. For fingerprints and ordinary dirt, begin with a clean, non-abrasive cloth instead.
Is mirror polishing safe for silver-plated jewellery?
Silver plating can be relatively thin, so abrasive polishing carries the risk of wearing through its surface. Gentle cleaning is generally preferable. If plating is already worn or scratched, professional assessment is safer than attempting to recreate a mirror finish with cutting compounds.
Why does polished silver look cloudy even after cleaning?
Cloudiness may result from remaining surface deposits, polishing film, fine scratches or a combination of these factors. First inspect the clean surface under different lighting conditions. If the haze is caused by scratches rather than removable contamination, stronger cleaning will not necessarily restore reflection clarity.
Can sterling silver develop a mirror finish without an electric polishing wheel?
Yes. Suitable solid sterling silver with an already smooth surface can achieve high reflectivity through carefully controlled fine hand polishing. However, deeper scratches and complicated contours may require professional corrective finishing. A hand-polished result should be assessed by reflection quality, not by whether every small mark has been eliminated.
Should oxidised silver details be polished to match the bright areas?
Not when the darkened areas are an intentional part of the design. Chemical dips and abrasive polishing can remove or alter decorative oxidation, reducing the contrast between polished highlights and recessed details. Clean and maintain these pieces according to their intended mixed finish rather than treating all dark areas as unwanted tarnish.