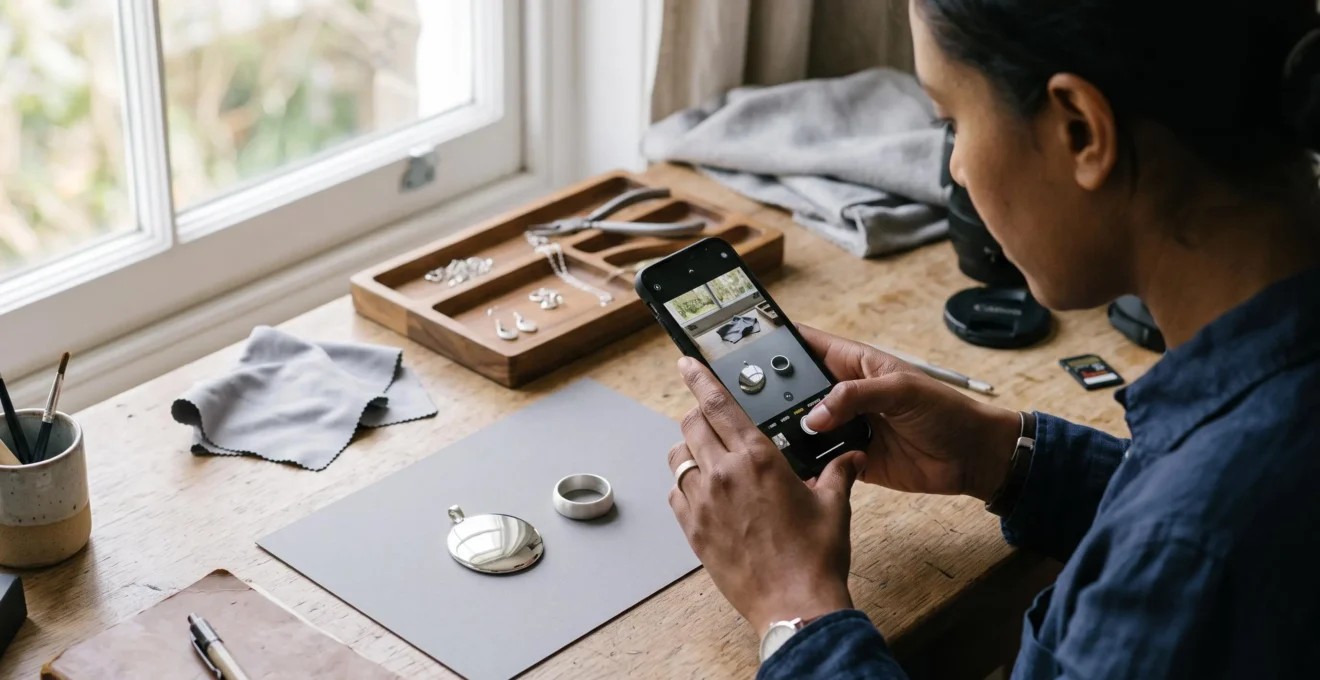
A silver necklace that sparkles beautifully in person can look unexpectedly dark in a smartphone photograph. Another piece may turn into a distracting white reflection beneath a ring light. These differences often come down to the jewellery’s surface finish, the position of the light and the angle of the camera.
For social media photography, mirror-polished silver offers crisp, attention-grabbing reflections when lighting is controlled, while brushed and satin finishes generally provide softer, less sharply defined highlights. Neither finish is automatically superior: the right choice depends on whether the photograph needs dramatic sparkle, visible texture or consistent detail.
Choosing photogenic silver also means understanding when tarnish needs cleaning, when scratches require professional attention and when polishing risks doing more harm than good. A simple comparison under the lighting used for actual content can reveal more than judging jewellery beneath shop displays.
Silver jewellery photography: the essentials
- Choose mirror-polished silver for defined reflections and dramatic close-ups, provided the light source and camera angle are controlled.
- Prefer satin or brushed finishes when softer highlights and less distracting reflections matter more than mirror-like brilliance.
- Inspect, clean and test jewellery before important photographs; avoid unnecessary abrasive polishing that removes metal and can damage delicate details.
- Why Mirror-Finish Silver Photographs Brighter Than Matte Textures
- How Professional Jewellers Achieve Glass-Like Mirror Reflectivity
- High Polish vs Brushed Finish: Which Flatters Cool vs Warm Skin Tones?
- When to Re-Polish Silver Before Important Events or Photoshoots
- The Buffing Blunder That Permanently Scratches Mirror-Finish Silver
- Which Silver Finishes Photograph Well Without Camera Flash Hotspots
- How Progressive Grit Polishing Creates Mirror Reflectivity From Scratched Silver
- How to Achieve Jeweller-Quality Mirror Finish on Silver at Home
Why Mirror-Finish Silver Photographs Brighter Than Matte Textures
Mirror-finish silver can look brighter in photographs because its smooth surface produces concentrated, sharply defined reflections. Matte silver scatters reflected light across different directions, creating a softer appearance. The advantage is conditional: polished jewellery may look intensely luminous at one camera angle and unexpectedly dark at another, depending on where the light is reflected.
The distinction is explained by two optical behaviours: specular reflection and diffuse reflection. A polished surface behaves like a small mirror, preserving recognisable reflected shapes. A brushed or roughened surface contains microscopic variations in orientation that redirect reflections across multiple angles.
The Optical Society of America’s explanation of light reflection describes these underlying principles. They explain the visual difference between smooth and rough surfaces, although they do not establish a measured brightness advantage for silver jewellery.
Consider a polished pendant positioned near a window. If the pendant reflects the window toward the camera, its surface may show a crisp, bright rectangle. Rotate it slightly, and that reflection may disappear. A neighbouring brushed pendant will usually produce a less recognisable reflection, even though both receive light from the same window.
This is why claims that mirror-finish silver always photographs three times brighter than matte silver are unreliable without a defined measurement and lighting setup. Apparent brightness varies with reflected surroundings, exposure and viewing geometry.
A straightforward comparison makes the mechanism visible:
- Place a polished silver piece and a matte-finish piece beside one window.
- Photograph both from a fixed position with the same camera settings.
- Look for the sharpness of reflected shapes, such as the window frame.
- Rotate each piece without changing the lighting and compare how the highlights move.
If a polished surface reflects a recognisable window outline, it has the directional reflectivity useful for dramatic jewellery close-ups. Fine scratches, tarnish and accumulated residue can interfere with the clarity of that reflection.
The important feature is not a fixed brightness multiplier but controllable reflection. Understanding that distinction makes professional finishing methods easier to evaluate.
How Professional Jewellers Achieve Glass-Like Mirror Reflectivity
Professional jewellers create mirror-like silver surfaces through successive finishing operations rather than a single polishing pass. They first assess and correct surface imperfections, refine remaining tool marks with suitable abrasives and then use progressively finer polishing compounds. The resulting clarity depends on the underlying metal condition, the finishing tools and how effectively earlier scratches have been removed.
A highly reflective finish begins below the visible shine. Scratches, pits and uneven areas interrupt the smooth surface needed to preserve sharply defined reflections. Applying fine polishing compound to an inadequately prepared piece may brighten the metal without correcting those defects.
Professional finishing separates two objectives:
- Surface correction: reducing appropriate scratches, tool marks and minor irregularities where doing so will not compromise the piece.
- Surface refinement: reducing the visible effects of preceding abrasive marks until the finish produces clean reflections.
In a technical workshop example, GIA’s bench tip on metal finishing and burnishing documents graded abrasive operations and separate tripoli and rouge polishing wheels. Its main subject is a burnishing tool, not a universal silver-polishing protocol, but it illustrates the distinction between correcting metal imperfections and finishing a surface.
Tripoli is commonly associated with earlier polishing operations, while rouge-type compounds are used for finer finishing. Their suitability depends on the metal, surface condition and the specific compound formulation. Neither should be treated as a guaranteed route to a particular photographic brightness or colour.
Polishing wheels also require professional handling. Excessive pressure, inappropriate compounds or unsuitable equipment can alter edges and details, while rotating tools introduce mechanical hazards. An intricate pendant with recessed patterns presents a different finishing problem from a plain silver band.
For photography, assess the finished result through reflected shapes rather than shine alone. A high-quality mirror surface should show comparatively clean, continuous reflections under appropriate illumination.
That distinction matters when selecting jewellery, too: the most highly polished finish is not necessarily the most flattering beside every skin tone or under every lighting arrangement.
High Polish vs Brushed Finish: Which Flatters Cool vs Warm Skin Tones?
High-polish silver can complement both cool and warm skin tones, but no reliable rule makes it universally better for cool complexions. Its reflective surface picks up surrounding colours and lights. Brushed silver creates a softer, less mirror-like appearance, making the best choice depend more on lighting, clothing, contrast and the desired photographic effect than on undertone alone.
A mirror-finish necklace may reflect a cool blue sky, a warm-toned wall or a colourful garment. These reflections can change how the metal appears beside skin, even when the jewellery itself remains unchanged.
A brushed finish reduces recognisable environmental reflections. Rather than presenting a distinct image of nearby objects, its textured surface creates a more distributed sheen. This can make the jewellery easier to photograph when the surroundings are visually busy.
Use the following comparison as a styling guide, not a scientifically established ranking of silver finishes by skin tone.
| Photography consideration | High-polish silver | Brushed or satin silver |
|---|---|---|
| Close-up jewellery portraits | Sharp highlights and recognisable reflections | Soft sheen with more visible surface texture |
| Cool-toned styling | Can echo cool surroundings and contrasting light | Can create a subdued, understated appearance |
| Warm-toned styling | May reflect warm clothing or nearby surfaces | Can provide a quieter contrast beside warm colours |
| Mixed lighting environments | Requires careful reflection control | Often offers less sharply defined reflections |
| Desired visual emphasis | Draws attention through distinct highlights | Favours texture and softer transitions |
Satin or semi-polished silver provides a useful middle ground when a content creator needs some reflective definition without the strongest mirror-like highlights. Its appearance will still change with the actual surface treatment and lighting setup.
Before choosing a finish based on undertone, photograph the same jewellery style against your own skin in two conditions: diffused daylight and the flash or artificial light normally used for content. Keep framing and exposure consistent where possible.
Compare how clearly the jewellery separates from clothing and skin, whether nearby colours contaminate reflections and whether bright patches distract from the overall composition.
Once the preferred appearance is established, maintaining that finish becomes more useful than repeatedly switching between textures. Timing maintenance around upcoming photographs helps preserve both the look and the jewellery itself.
When to Re-Polish Silver Before Important Events or Photoshoots
Re-polish silver before an important shoot only when cleaning and lighting adjustments cannot address the visible problem. Minor dirt or tarnish may call for gentle, compatible cleaning, while scratches embedded in the finish require more substantial intervention. Inspect the piece well before the event so there is time to identify damage without resorting to aggressive last-minute polishing.
Start by distinguishing surface tarnish from physical scratches. Tarnish changes the surface’s colour and appearance through chemical reactions. Scratches alter the metal’s physical texture, disrupting reflected shapes even after the object is clean.
The Canadian Conservation Institute explains that silver tarnish commonly forms through reactions with sulfur-containing gases. It also cautions that abrasive tarnish removal can remove underlying silver, potentially wearing away fine details or plating over time.
A pre-event assessment can therefore follow a simple sequence rather than a fixed polishing schedule.
| When to inspect | What to check | Appropriate response |
|---|---|---|
| Well before the shoot | Deep scratches, worn plating, damaged details | Request professional assessment before attempting refinishing |
| Several days beforehand | Visible tarnish, dirt, fingerprints and surface residue | Identify the materials and choose a compatible gentle cleaning method |
| During a lighting rehearsal | Dark reflections, uneven-looking highlights or glare | Adjust lighting and camera position before assuming further polishing is needed |
| Immediately before photographing | Fresh fingerprints, lint or loose dust | Perform only suitable, minimal final cleaning and inspection |
These are practical planning stages, not prescribed treatment intervals. Jewellery containing gemstones, plating, adhesives or moisture-sensitive materials may require different care.
Use a test photograph taken under lighting similar to the planned shoot. Inspect the image for discoloured patches, fine scratches, fingerprints and unwanted environmental reflections. A dark area is not necessarily tarnish; it may simply be a reflection of something dark in the room.
Avoid heavy polishing immediately before an event. Residue may collect in recessed details, while rushed abrasion introduces risks that cannot be corrected with a final wipe.
Even a carefully timed cleaning session can create new problems when polishing materials are contaminated. Protecting an existing mirror finish is generally preferable to rebuilding one.
The Buffing Blunder That Permanently Scratches Mirror-Finish Silver
One of the most avoidable polishing mistakes is rubbing silver with a dirty or contaminated cloth. Trapped grit and other abrasive particles can scratch the metal, replacing a clear mirror-like reflection with fine marks. These scratches are physical changes, not tarnish, and restoring the original appearance may require removing additional surface material.
Silver polishing materials gradually collect residues and particles during use. A cloth that has been used on a heavily tarnished object may no longer be appropriate for delicate final finishing, especially if it has also collected dust or harder debris.
According to the Canadian Conservation Institute’s silver-polishing procedure, abrasive contamination can be assessed by testing materials on an acrylic surface and checking for scratches. Its guidance also recommends replacing soiled cotton pads and periodically cleaning and inspecting the object during treatment.
“Each time tarnish is removed, the silver that reacted to form the tarnish is lost.”
That material loss matters particularly for thinly plated jewellery, engraving and finely detailed designs. A scratch may be difficult to reverse without further abrasion, and a sufficiently deep mark may be inappropriate to remove at all.
To reduce the risk:
- Remove loose dust with a clean, suitable soft brush before polishing.
- Use clean, appropriate materials and keep final-finishing cloths separate from heavily soiled cleaning materials.
- Replace cloths or pads that have collected debris instead of continuing to rub.
- Use only the pressure and movement appropriate to the cleaning method and object.
- Stop regularly to inspect the surface rather than polishing until a cloth stops darkening.
There is no universal requirement to polish silver in only one direction. The Canadian Conservation Institute’s documented conservation procedure permits gentle circular movements with appropriate materials. Cleanliness, abrasive suitability and the object’s condition are more important than adopting a single motion for every piece.
A clean mirror finish should not be repeatedly abraded merely to make it appear brighter. Sometimes repositioning the light produces a larger photographic improvement than additional polishing.
Once the surface is clean and undamaged, the next challenge is photographic rather than mechanical: preventing its reflections from overwhelming the camera.
Which Silver Finishes Photograph Well Without Camera Flash Hotspots
Satin and brushed silver can be easier to photograph without sharply defined flash hotspots because their textured surfaces distribute reflections across different directions. Mirror-polished silver is more likely to show a concentrated reflection of a small light source when the geometry aligns. However, any finish can produce unwanted brightness, and lighting control remains more dependable than finish selection alone.
A photographic hotspot occurs when reflected light creates an excessively bright area that loses visible detail. With polished silver, a direct flash or exposed lamp may appear as a bright point or clearly defined shape on the metal.
Increasing the apparent size of the light source can make reflections broader and softer. Moving the jewellery, camera or light also changes where reflections appear.
Different finishes offer practical starting points for lighting decisions:
| Silver finish | Likely reflection character | Useful lighting approach |
|---|---|---|
| Mirror-polished | Defined reflections that may show intense hotspots | Large diffused source, careful camera and object angles |
| Satin | Broader, softer highlights | Soft side lighting to preserve gentle surface sheen |
| Brushed | Directional texture with less recognisable reflected imagery | Angled illumination that makes the grain visible |
| Hammered | Multiple reflections across individual facets | Controlled directional light with exposure checks |
| Oxidized | Darkened recessed or treated areas with variable reflections | Soft illumination balanced to retain detail in darker regions |
These are qualitative photographic tendencies, not an experimental ranking of jewellery finishes.
Yale University’s visible-light imaging guidance discusses specular illumination, light positioning and the use of softer sources such as softboxes and umbrellas. Although aimed at imaging and conservation documentation, its principles help explain why reflective jewellery requires careful management of light direction and exposure.
For a quick diagnostic, aim a phone flashlight toward a silver piece and observe how the reflection changes as the object rotates. A tiny, intense reflected spot indicates a lighting arrangement that could produce distracting highlights. This is a practical visual check rather than a standardized predictor of photographic overexposure.
Hotspots and tarnish require different solutions. Hotspots follow the geometry of light and camera. Tarnish is a surface alteration that remains when the lighting changes, although its appearance may vary. Unwanted dark reflections can also make otherwise clean silver look dull.
Where lighting adjustments still reveal genuine scratches, abrasive surface refinement may be relevant—but only after deciding whether the jewellery can safely tolerate it.
How Progressive Grit Polishing Creates Mirror Reflectivity From Scratched Silver
Progressive abrasive polishing builds mirror reflectivity by replacing larger surface scratches with increasingly finer marks. Each appropriately selected stage reduces the irregularities left by the previous operation until reflections become clearer. It is not a harmless treatment: removing scratches also removes metal, and abrasive work may be unsuitable for plated, engraved, delicate or historically valuable jewellery.
Imagine a scratched silver surface under angled lighting. Its deeper marks interrupt reflected shapes and may appear as visible lines. An appropriately selected abrasive reduces surface irregularities but creates its own scratch pattern. Finer abrasives can then progressively refine that pattern.
The underlying principle is simple: each finishing stage must address the marks left by the preceding stage. Moving straight from visibly deep scratches to a fine finishing compound may produce shine while leaving the original damage apparent.
Professional technical guidance from GIA documents graded abrasives alongside tripoli and rouge polishing operations. The cited procedure includes abrasive grades used for preparing a burnishing tool; those grades should not be copied as a universal sequence for silver jewellery.
For an object suitable for refinishing, the conceptual progression is:
- Assess the damage: identify visible scratches, worn plating, engraving and fragile features before removing material.
- Determine whether correction is appropriate: distinguish superficial cosmetic wear from damage requiring professional intervention.
- Refine progressively: use abrasives selected for the particular surface, allowing each suitable stage to address preceding marks.
- Inspect under angled light: check the remaining scratch pattern before any further refinement.
- Finish and clean: use compatible fine finishing materials, then remove residues without introducing new abrasion.
This describes the sequence rather than prescribing particular grit numbers, tools or pressures for all silver objects. Deep damage, thin plating and intricate components may make the process inappropriate.
Angled illumination is especially helpful during inspection because it can reveal surface irregularities that are difficult to see under broad, flat lighting. Compare the surface from the same viewing position after each appropriate stage, rather than judging improvement solely by how brightly the silver gleams.
There is an important trade-off between reflectivity and preservation. Repeated abrasive treatment may soften edges, reduce engraving depth or expose an underlying metal beneath plating. A mirror-like photograph is not necessarily worth permanently changing those features.
The safer alternative for uncertain pieces is a professional assessment or a change in lighting strategy that makes existing surface texture less distracting.
For home photography, the most effective routine usually begins with gentle maintenance and deliberate lighting, reserving significant resurfacing for objects that genuinely need it.
Key takeaways before preparing silver at home
- Assess the jewellery’s construction, plating and existing finish before choosing any treatment; shine should never come at the expense of fragile details.
- Use the gentlest compatible cleaning approach first, and distinguish surface contamination from scratches that require metal removal.
- Judge the finished appearance in the actual photography setup, because lighting and reflected surroundings can matter as much as polishing quality.
How to Achieve Jeweller-Quality Mirror Finish on Silver at Home
A striking, camera-ready mirror finish is sometimes achievable at home on suitable silver jewellery, but a professional-quality result cannot be guaranteed with household polishing tools. The safest approach is to assess the piece, clean it appropriately, preserve its existing finish and test reflections under controlled lighting. Significant scratches or complex designs may need professional refinishing.
Begin by identifying the jewellery’s material and construction. Solid silver, silver-plated items, gemstone settings and deliberately oxidized designs do not necessarily tolerate the same products or techniques. Treat unknown coatings, adhesives and moisture-sensitive components as reasons to seek specific care instructions.
If the jewellery is structurally sound, remove loose dust and inspect it under angled light. Determine whether the visible problem comes from ordinary dirt, tarnish, fine scratches or reflections of the surrounding environment.
For compatible objects, the Canadian Conservation Institute documents a relatively mild polishing method using precipitated calcium carbonate and water. Its technical guidance emphasizes assessing suitability, testing polishing materials, replacing soiled pads and removing residues after treatment. This conservation procedure is not a universal recommendation for assembled jewellery or a guaranteed route to machine-quality mirror reflectivity.
Where cleaning is insufficient and actual refinishing is appropriate, the metal may need progressive abrasive work. That decision should account for surface thickness, decorative detail and the risk of irreversible material loss. Avoid using powered buffing equipment without appropriate training and safety precautions.
Five-step camera-ready silver checklist
- Identify the piece. Record whether it is solid silver, plated, set with stones or deliberately textured; the deliverable is a basic material-and-finish note.
- Inspect the surface. Photograph it under angled light and mark visible tarnish, scratches or damaged areas; the deliverable is an initial condition photograph.
- Choose suitable care. Consult material-specific instructions and use only compatible gentle cleaning where appropriate; the deliverable is a clean, inspected piece without visible loose residue.
- Test the lighting. Capture comparison photographs using diffused light and the intended shoot setup; the deliverable is a pair of images showing reflection behaviour.
- Approve the final look. Inspect highlights, scratches and exposure before filming or photographing; the deliverable is one reference image with acceptable surface detail and reflections.
After preparation, reduce unnecessary contact and store the jewellery in a clean, dry environment appropriate to its materials. Minimizing exposure to tarnish-promoting conditions and avoiding contaminated polishing materials can help preserve the existing finish. Storage requirements may differ for jewellery containing sensitive stones or other components.
For recurring social media content, maintain a simple reference photograph of each favourite piece under consistent lighting. This makes it easier to see when an actual surface change has occurred rather than mistaking a new reflection for deterioration.
Home finishing has practical limits. Deep recesses, intricate filigree, worn plating and significant damage may be difficult or inappropriate to correct without professional equipment and experience. A clean piece photographed skilfully can produce more convincing results than an aggressively polished piece photographed under uncontrolled light.
For the next photoshoot, choose the finish that supports the intended visual style, inspect the piece using the five-step checklist and capture a lighting test before the final image. Preserve the silver whenever a camera or lighting adjustment can achieve the desired result.
Why does polished silver sometimes look black in photographs?
Mirror-polished silver reflects its surroundings. If the camera captures a reflection of a dark wall, ceiling, camera or other object, the silver may appear black even when its surface is clean. Try changing the position of the jewellery or adding a broad, softly illuminated surface for it to reflect before assuming that the metal needs polishing.
Can a smartphone camera capture professional-looking silver jewellery photographs?
Yes. A smartphone can capture attractive silver jewellery images when focus, exposure, lighting and composition are controlled. Position a broad diffused light source near the piece, keep the camera steady and adjust the viewing angle until the reflections define the jewellery without obscuring its shape or details.
Should silver jewellery be polished before every social media photoshoot?
No. Frequent abrasive polishing is unnecessary when the jewellery is already clean and its finish remains suitable for photography. Inspect it first, remove compatible surface dirt gently when needed and adjust lighting before considering further treatment. Repeated abrasion can gradually remove silver and damage fine details.
Does silver plating require different care from solid silver?
Yes. Silver-plated jewellery has a layer of silver over another material, so abrasive polishing can wear through that layer and expose the underlying metal. Yellowish areas may indicate exposed base metal rather than ordinary tarnish. Avoid aggressive resurfacing and seek material-specific care guidance when the plating’s condition is uncertain.
Can photo editing replace physical silver polishing?
Editing can adjust exposure, white balance and contrast, but it cannot reliably recover detail from completely overexposed highlights or restore genuinely missing surface detail. Better illumination and camera positioning should come first. Editing is most useful for refining an already well-lit photograph, rather than disguising damaged jewellery or severe reflective glare.