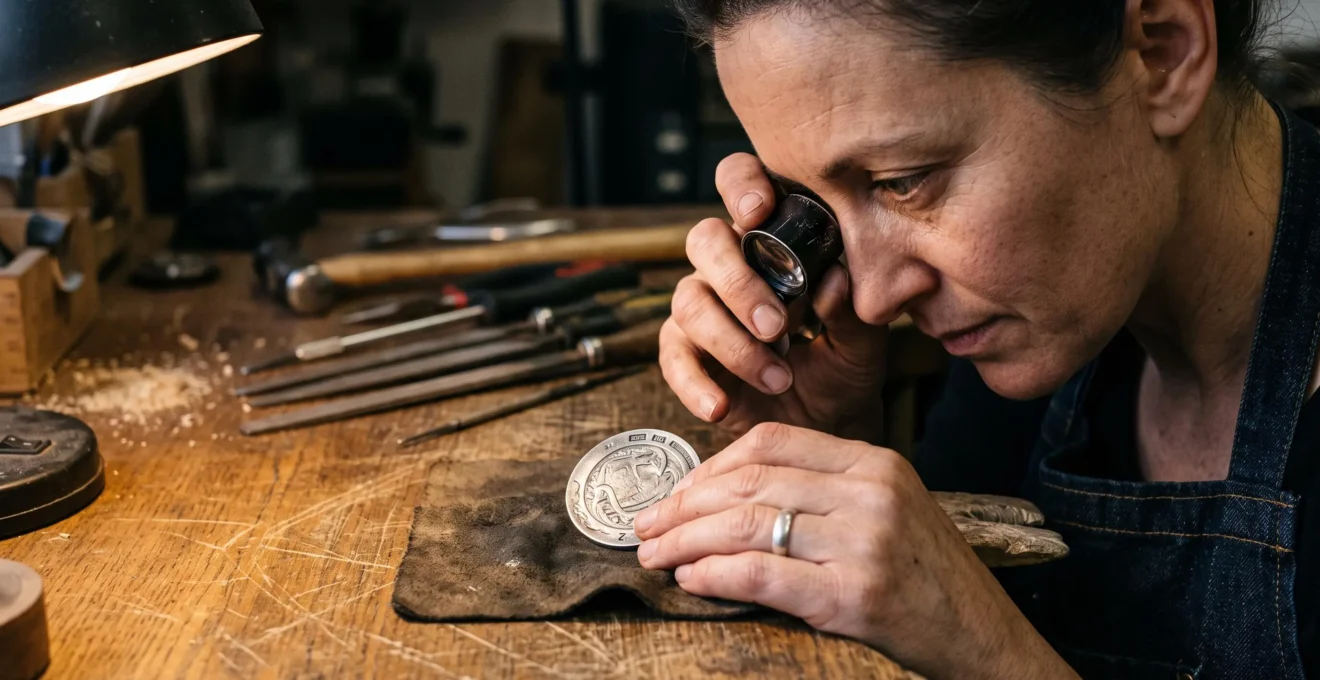
The finest details on silver jewellery are often the first to disappear during routine care. A shallow hand-engraved line, a miniature hallmark or a row of millgrain beads may withstand decades of careful wear yet gradually lose definition when repeatedly polished with abrasive products.
The damage is rarely immediate. Each polishing session may remove an amount of metal too small to notice without magnification. Eventually, once-sharp edges become rounded, inscriptions lose contrast and decorative textures appear indistinct. Unlike surface tarnish, the missing silver cannot simply be cleaned back into place.
Preserving microscopic silver details means minimising unnecessary metal removal, protecting vulnerable surfaces from friction and documenting their condition before changes become irreversible. That requires distinguishing ordinary dirt from tarnish, selecting cleaning methods for specific surface finishes and recognising when a jeweller or conservator should intervene.
The objective is not to keep every silver surface uniformly bright. It is to preserve the craftsmanship that gives the object its identity.
Protecting fine silver details: the essentials
- Limit abrasive polishing: repeated polishing can gradually remove silver, soften engraving edges and flatten delicate decorative relief.
- Match care to the surface: use gentle dust removal around engravings and millgrain; reserve polishing treatments for suitable areas where tarnish removal is necessary.
- Inspect and document: magnification, consistent photographs and pre-repair assessments help identify damage before further treatment.
- Why Aggressive Polishing Erases Engraved Detail Depth Over Time
- Soft Brushing vs Polishing Cloths: Which Preserves Microscopic Silver Details?
- How to Use Magnification to Verify Detail-Safe Cleaning Results
- The Resizing Error That Destroys Engraved Details Permanently
- How to Photographically Document Delicate Details Before They Degrade
- The Cleaning Error That Flattens Delicate Millgrain Beading Permanently
- Microfibre Cloths vs Jeweller’s Rouge: Which for Mirror-Finish Maintenance?
- How to Achieve a Jeweller-Quality Mirror Finish on Silver at Home
Why Aggressive Polishing Erases Engraved Detail Depth Over Time
Abrasive polishing removes a small amount of silver along with surface tarnish. On an engraved object, this gradually changes the relationship between the surrounding surface and the recessed design. Shallow markings are particularly vulnerable because relatively little material needs to disappear before their edges lose definition.
Silver tarnish forms mainly when silver reacts with sulfur-containing substances in its environment, producing silver sulfide on the surface. Removing this discoloration is different from preserving the underlying metal: a polishing method can remove both the tarnish and some untarnished silver.
According to the Canadian Conservation Institute guidance on silver polishing, repeated cycles of tarnishing and polishing can eventually remove enough metal to eliminate fine decorative details.
The danger is cumulative. Engraved lines do not necessarily disappear uniformly. Their upper shoulders may become rounded, altering how light catches the design long before the deepest part of the cut is lost.
A hallmark with shallow stamped characters, for example, may become harder to read even while deeper surrounding engraving remains visible.
There is no established universal rule that polishing removes 50% of engraving depth. Actual loss depends on several interacting factors:
- Abrasive composition: polishing compounds with different particles and cutting characteristics can produce different levels of abrasion.
- Frequency: repeatedly polishing an object creates more opportunities for cumulative material loss.
- Pressure and technique: sustained pressure and repeated passes over one area increase exposure to abrasion.
- Original engraving depth: shallow stamped marks and lightly cut ornamentation generally have less material available before their definition changes.
- Surface construction: silver plating and historically modified finishes introduce additional vulnerability.
Jeweller’s rouge, tripoli and household metal pastes should not be treated as interchangeable. Their abrasive behaviour depends on formulation and application; a universal ranking of metal loss cannot be assumed without testing the actual products.
“After many cycles of tarnishing and polishing, so much silver may be removed that fine detail on the object is lost.”
Mechanical buffing deserves particular caution. Powered wheels can remove material quickly, and inappropriate pressure, speed or heat can contribute to unwanted changes in vulnerable surfaces. The precise risk depends on the equipment, compound and operator.
Another preservation decision is whether every dark recess needs cleaning. Some retained patination may provide the contrast that makes engraving legible. Removing it indiscriminately can change the object’s appearance even before significant substrate loss occurs.
The safest long-term strategy is to reduce unnecessary polishing rather than repeatedly restore maximum brightness. That principle determines which cleaning tools are appropriate for finely worked silver.
Soft Brushing vs Polishing Cloths: Which Preserves Microscopic Silver Details?
A very soft brush is generally preferable for removing loose dust and polishing residue from detailed silver, while a suitable polishing cloth can help treat light tarnish on less vulnerable surfaces. The distinction matters: dry brushing does not reliably remove chemically bonded silver sulfide, whereas impregnated polishing cloths may contain abrasives that also remove silver.
Tool selection should therefore depend on the surface being treated and what needs removing. Loose dust, fingerprints, bonded tarnish and embedded polishing compound are different problems.
The Canadian Conservation Institute’s advice on silver care and tarnish removal identifies abrasive-impregnated polishing cloths as useful for lightly tarnished silver but warns against excessive cleaning and the use of unnecessarily aggressive polishes.
For intricate jewellery, the following comparison offers a practical starting point.
| Surface or condition | Soft brush | Polishing cloth |
|---|---|---|
| Engraved recesses | Suitable for loose dust and accessible residue with minimal pressure | Avoid repeated abrasive rubbing across fine engraving edges |
| Millgrain decoration | Preferred for careful dry dust removal where the structure is stable | Risk of wearing down raised beads through repeated friction |
| Plain, lightly tarnished silver | Does not reliably remove bonded tarnish | A suitable silver-polishing cloth may remove light tarnish |
| Flat, mirror-finished areas | Useful for preliminary dust removal | Can be used selectively, depending on cloth formulation |
| Polishing compound in grooves | A small, very soft brush may lift accessible residue | May be unable to reach narrow recesses effectively |
A key distinction is that untreated microfibre, untreated soft cotton and chemically impregnated polishing cloths are not the same material. An untreated cloth can pick up loose contamination, whereas a treated cloth may intentionally use abrasive action to remove tarnish.
Neither tool should be used over gritty dirt without first removing loose particles. Even a soft fabric can drag hard contamination across a delicate surface.
For stable decorative surfaces, a soft natural-bristle brush can be used with controlled, light movements to dislodge dust. Avoid attempting to force bristles into fragile ornamentation or using vigorous scrubbing to remove dark tarnish.
If bonded tarnish remains, the next decision is whether removing it is necessary. Valuable antique pieces, intentional patination, coatings and mixed-material jewellery may call for professional assessment rather than additional cleaning at home.
A tool can appear gentle in the hand yet still change the object over repeated use. Magnified inspection provides a way to detect those changes while they are still subtle.
How to Use Magnification to Verify Detail-Safe Cleaning Results
Magnification helps reveal changes in engraving edges, millgrain contours and trapped cleaning residues that may escape unaided inspection. A 10x jeweller’s loupe or a basic USB microscope can provide a useful home reference when used with consistent lighting, viewing angles and photographs. Comparing the same details over time is more informative than judging brightness alone.
Begin with a condition check before cleaning. Identify a small group of distinctive features: a shallow letter, a hallmark corner, a tiny decorative bead or a sharply cut line intersection.
These features become reference points for subsequent inspections.
Under magnification, examine three characteristics:
- Edge crispness: look for engraved shoulders becoming softer, wider or less clearly defined.
- Raised relief: check whether millgrain beads retain their individual rounded profiles and visible separation.
- Residual material: distinguish dark patination from visible polishing paste or powder lodged in grooves.
Lighting must remain reasonably consistent. A change in light direction can make an intact edge appear shallower or deeper, creating a misleading impression of material loss.
Similarly, a darker image after cleaning does not necessarily indicate damage. Exposure, reflections and remaining patination can affect contrast.
The Canadian Conservation Institute recommends examining silver under magnification after polishing and checking for retained abrasive particles. Its conservation guidance also illustrates how polishing residue can accumulate in recessed decoration.
For an owner inspecting jewellery at home, the following comparison routine is a practical adaptation of those conservation principles, not a laboratory-validated measurement of metal loss.
Five-step microscopic detail inspection checklist
- Choose a reference feature: identify one engraving intersection or hallmark character and record its location in a baseline photograph.
- Record the starting condition: take a focused magnified image before cleaning and save the original file with its date.
- Remove loose contamination cautiously: use an appropriate gentle method for the object’s materials and record the treatment performed.
- Repeat the inspection: photograph the same feature under comparable lighting and magnification, producing a before-and-after image pair.
- Log visible differences: note edge shape, bead definition and remaining residue in a short condition record; stop abrasive treatment if unexplained changes appear.
Comparisons after successive cleaning cycles are particularly useful because individual treatments may cause changes too small for a home microscope to establish confidently.
Home magnification cannot reliably quantify micrometres of lost engraving depth without appropriate measurement equipment and calibration. Its value lies in observation, early warning and communicating concerns to a specialist.
Photographic evidence becomes especially important before irreversible interventions. Cleaning is only one threat to fine silver details; ring resizing can alter an engraved surface through an entirely different mechanism.
The Resizing Error That Destroys Engraved Details Permanently
Ring resizing can damage engraving when a jeweller cuts, removes, inserts or reshapes metal in a region containing decorative marks. The greatest avoidable error is approving a resizing procedure before locating inscriptions, hallmarks and continuous patterns around the band.
Conventional resizing commonly involves opening the ring shank and either inserting metal to enlarge the circumference or removing a section to reduce it.
For a plain ring, the bottom of the shank is often a convenient working area. On an engraved ring, however, the same location may contain an inscription or maker’s mark.
Jewelers of America‘s jewellery repair guidance explicitly recognises that quality marks or inscriptions may prevent resizing at the usual shank position.
That makes engraving location a practical constraint, not merely a cosmetic preference.
Consider the difference between the available approaches.
| Method | Potential detail risk | Preservation consideration |
|---|---|---|
| Cutting and inserting metal | Interruption of an inscription or continuous design at the join | Locate the join away from significant decorative features where feasible |
| Cutting and removing metal | Permanent removal of existing engraving within the deleted section | Map inscriptions before deciding where material can be removed |
| Mechanical stretching | Possible distortion or redistribution of patterns depending on construction and technique | Ask whether stretching is appropriate for the specific ring |
| Internal sizing beads | Changes to internal fit without the same type of circumference alteration | May be an option for relatively small fit adjustments |
Stretching and cutting should not be treated as equally suitable alternatives for every ring. Gemstone settings, metal thickness, existing repairs, engraving placement and structural condition can restrict the available methods.
Jewelers of America describes sizing beads as a possible solution for relatively small discrepancies, around half a ring size or less, although suitability still requires professional assessment.
Before authorising work, photograph the entire outside and inside of the shank, including all decorative transitions. Mark the approximate positions of inscriptions on a simple ring diagram.
Ask the jeweller where the cut, seam, soldering or finishing work will occur and whether any engraved area may be affected.
Replacing damaged engraving is not equivalent to preserving the original. A skilled engraver may recreate a design, but differences in cutting technique, tool marks or depth may remain, particularly on historical handwork.
A pre-service condition record helps the owner and jeweller identify which features need protecting. The same documentation principle applies long before any repair becomes necessary.
How to Photographically Document Delicate Details Before They Degrade
Photographic documentation is most useful when it records a silver object’s condition in a way that can be repeated. An attractive photograph may demonstrate the jewellery’s appearance, but a consistent technical image can also reveal changes in engraving boundaries, hallmarks and raised decorative features.
The essential technique is controlled lighting. A single light placed at a low angle to the surface, commonly called raking light, creates shadows that make subtle relief easier to examine.
The Smithsonian conservation case study on raking-light photography demonstrates how controlled directional illumination can reveal physical condition and support before-and-after comparisons.
That published example concerns historic illustrations rather than silver jewellery, so applying the technique to engravings is a practical adaptation, not a validated method for measuring microscopic silver loss.
For repeatable home documentation, place the object on a neutral, non-abrasive background. Stabilise the camera using a tripod or another secure support and position a scale reference near the area being recorded.
Take an overall view first, then closer images of individual hallmarks, inscriptions, millgrain boundaries and distinctive surface marks. Keep the camera orientation, lighting direction and approximate distance recorded so that future photographs can be reproduced.
Capture both ordinary diffuse illumination and directional light when possible. The former makes overall appearance easier to compare; the latter can clarify low-relief features.
Preserve the original image files rather than relying exclusively on edited or sharpened versions. Processing can make an image more visually appealing while changing the appearance of tiny edges.
Dated photographs may provide useful supporting documentation for restoration discussions, ownership records, insurance enquiries and examination of identifying marks. They should not, however, be assumed to establish authenticity, insured value or the precise depth of engraving by themselves.
A sensible documentation schedule follows events affecting the object: when acquired, before and after professional cleaning, before and after resizing, and whenever an unexpected change becomes visible.
There is no need to invent a fixed monthly inspection requirement for jewellery worn only occasionally. The practical aim is a consistent baseline and a record of meaningful interventions.
Close-up photographs are particularly revealing around millgrain decoration, where individual raised beads can lose definition through repeated contact with cleaning materials.
The Cleaning Error That Flattens Delicate Millgrain Beading Permanently
Millgrain is a decorative border made up of tiny raised beads along an edge or setting. Its appearance depends on the separation, shape and regularity of those beads.
The cleaning mistake most likely to threaten this definition is repeated abrasive rubbing directly across the raised border. Because millgrain projects above the adjacent surface, its highest points can be exposed to concentrated friction.
Polishing cloths and abrasive pastes may appear harmless when applied briefly. Over repeated treatments, however, their contact with delicate raised decoration can wear down fine contours.
The Canadian Conservation Institute warns generally that abrasive cleaning can remove fine decorative details from silver. Although its published guidance does not provide a controlled wear study specifically measuring millgrain, the same material-removal mechanism gives good reason for caution.
The safest starting point is to determine whether the apparent discoloration is loose dirt, actual tarnish or an intentional darkened finish around the beads.
For loose dust on structurally sound millgrain, use a very soft brush with minimal pressure. Gentle contact is preferable to repeatedly dragging a polishing cloth across the full beaded border.
Do not assume that brushing removes bonded tarnish. If silver sulfide remains between the beads, further dry scrubbing may increase mechanical stress without delivering the desired cleaning result.
For a ring with polished shoulders adjoining a millgrain border, treat the surfaces as separate zones. Any suitable polishing treatment should be confined to areas that can be reached without abrading the fragile border.
Avoid forcing paste into the bead valleys. Residue can be difficult to remove without repeated handling, particularly where the ornamentation is irregular or worn.
Under magnification, inspect whether individual beads still have clearly distinguishable contours. An uneven surface may reflect original hand-finishing, historical wear or later treatment; a single photograph cannot necessarily establish the cause.
Once metal has been ground away, additional polishing cannot rebuild it. A specialist may be able to recreate millgrain using appropriate tools, but that intervention changes the physical surface and may not be desirable for historically significant jewellery.
On antique pieces, preserving original workmanship can be more important than restoring a perfectly regular decorative border.
Recognising which surfaces must remain untouched by abrasives also clarifies the difference between everyday wiping and deliberate scratch removal on plain silver.
Microfibre Cloths vs Jeweller’s Rouge: Which for Mirror-Finish Maintenance?
Untreated microfibre is generally the more conservative choice for removing fingerprints and loose surface contamination from smooth silver. Jeweller’s rouge serves a different purpose: it is a fine abrasive polishing compound used to refine metal surfaces. Although it can improve the appearance of suitable high-polish areas, repeated use removes material and should be avoided across delicate engraving or millgrain.
Microfibre works primarily through contact with the surface, collecting oils, dust and other removable contaminants. Clean, soft fabric used with light pressure can maintain appearance without deliberately cutting down the metal.
That does not make it universally non-abrasive. Trapped grit, excessive pressure and unsuitable fabric condition can still create scratches.
Nor does untreated microfibre reliably remove established silver sulfide tarnish. A visibly darkened area may require a different treatment decision rather than harder rubbing.
Jeweller’s rouge, by contrast, contains abrasive material intended to refine scratches and surface irregularities. Its performance depends on the formulation, carrier, applied pressure and polishing technique.
The practical distinction is between maintenance cleaning and metal-surface refinement.
| Criterion | Untreated microfibre | Jeweller’s rouge |
|---|---|---|
| Primary purpose | Remove accessible fingerprints and loose contamination | Refine suitable metal surfaces through fine abrasion |
| Metal removal | Not intended to remove metal during gentle use | Removes some material as part of polishing |
| Fine engraving | Use cautiously on accessible, stable surfaces | Avoid direct application across delicate details |
| Millgrain | Avoid repeated rubbing over raised beads | Unsuitable for routine treatment of fragile beadwork |
| Plain mirror finish | Useful for routine fingerprints and haze from loose contamination | Potentially useful for controlled surface refinement |
| Embedded residue | Limited reach into narrow recesses | Can introduce compound that subsequently requires removal |
A common mistake is using rouge across an entire engraved object because the surrounding plain silver looks dull. Polishing compound can accumulate in grooves, obscuring contrast and requiring additional cleaning to remove it.
The conservation guidance discussed earlier recommends careful removal of abrasive residues and examination under magnification after polishing.
For routine care, start with a clean, untreated cloth only after removing loose particles. If a smooth surface remains tarnished or scratched, decide whether the appearance justifies a treatment that removes metal.
Rouge should not be a routine substitute for fingerprint removal, particularly on jewellery with stamps, inscriptions, vulnerable coatings or decorative borders.
A mirror finish can sometimes be restored on appropriate plain silver surfaces, but its pursuit must remain separate from preserving engraved craftsmanship.
Key takeaways before attempting a mirror finish
- A high-gloss finish and preserved microscopic decoration are different objectives; polishing methods suitable for one may damage the other.
- Confirm that the area is solid silver with a stable, undecorated surface before considering abrasive refinement.
- If scratches are deep, the finish is historical or the piece contains vulnerable details, a professional assessment is preferable to escalating home polishing.
How to Achieve a Jeweller-Quality Mirror Finish on Silver at Home
A mirror-like finish may be achievable on suitable plain, smooth silver through careful cleaning and controlled surface polishing. However, a true jeweller-quality result depends on the starting condition, scratches, alloy and polishing equipment. For objects with engraving, millgrain, plating or historic surfaces, preserving detail should take priority over obtaining uniform reflectivity.
Before working, establish whether the surface is genuinely appropriate for home polishing. An unadorned sterling-silver area differs substantially from a silver-plated piece or a decorative surface with an intentionally aged finish.
If the metal is plated, aggressive polishing can expose the underlying material. If the surface contains protective coatings, stones or mixed materials, products suitable for bare sterling silver may be inappropriate.
The following progression applies only to a stable, accessible, undecorated silver surface that has been judged suitable for treatment.
- Assess and remove loose contamination. Examine the surface for particles, coatings, plating and damage. Remove loose dust gently before using any cloth, so grit is not dragged across the metal.
- Clean surface oils appropriately. Use a cleaning method compatible with the object’s construction. Avoid soaking pieces containing moisture-sensitive components or uncertain settings.
- Perform a gentle pre-clean. Use clean, untreated microfibre with light pressure to remove accessible fingerprints and determine whether further treatment is actually required.
- Consider controlled abrasive refinement only if justified. On an appropriate plain area, a compatible fine polishing compound such as jeweller’s rouge may reduce superficial surface imperfections. Follow the product’s instructions and avoid contact with decorative details, seams and vulnerable components.
- Remove residue and inspect. Use a separate clean cloth and suitable residue-removal method, then examine the surface under magnification before considering another pass.
This is a conservative treatment framework, not a guarantee of a professional mirror finish. The behaviour of a polishing compound varies with its specific formulation, applicator and pressure.
More importantly, a mirror finish is achieved by changing the surface, not by recovering metal that has already been lost. Refining scratches through abrasion progressively removes material around them.
Deep scratches, dents and substantial deformation cannot realistically be eliminated by gentle hand polishing without significant intervention. Continuing to rub may broaden polished areas, soften adjacent edges or create an inconsistent finish.
A professional jeweller can evaluate whether mechanical polishing, local repair or no treatment is the better choice. Powered polishing wheels are not automatically safer: their effectiveness and risks depend on skilled control of abrasive action and the object’s construction.
On pieces that combine flat bright surfaces with engraved ornamentation, it may be appropriate to leave the detailed areas untouched while maintaining only accessible undecorated sections.
Uniform brightness is not always an improvement. Darkened grooves can enhance the readability of historic engraving, while minor scratches may form part of an object’s documented condition.
Before the next cleaning session, examine the object closely, record its finest features and identify which surfaces actually require treatment. When the preservation risk is uncertain, consult a qualified jeweller or metals conservator rather than increasing pressure or switching to a stronger abrasive.
Can lost silver engraving depth be restored by cleaning?
No. Cleaning may remove deposits that obscure engraving, but it cannot replace silver lost through abrasion. A skilled engraver may be able to re-cut some details, although doing so changes the existing surface and may not reproduce the original workmanship exactly.
Should dark tarnish always be removed from engraved silver?
Not necessarily. Darkened recesses can contribute to visual contrast, and some silver objects have intentional patination. Aggressively removing every trace of tarnish may alter the design’s appearance. Historical or intentionally finished pieces deserve individual assessment before treatment.
Is a 10x jeweller’s loupe sufficient to detect polishing damage?
A 10x loupe can help reveal visible edge rounding, surface scratches and lodged polishing residue. However, it cannot reliably measure microscopic metal loss or establish the cause of subtle changes without consistent observations and, where necessary, specialised examination.
Are chemical silver dips safer than abrasive polishing for detailed jewellery?
Not automatically. Although chemical dips work differently from abrasive polishing, they can overclean engraved or chased decoration and alter the contrast created by darkened recesses. They may also be unsuitable for jewellery containing vulnerable materials or finishes. The Canadian Conservation Institute advises considering the object’s construction and treatment risks rather than assuming one method is universally safe.
How should intricately engraved silver be stored between uses?
Keep pieces in a clean, dry, protective environment that limits exposure to tarnish-promoting contaminants and prevents unnecessary contact with harder objects. Use suitable non-abrasive storage materials, keep individual pieces separated and avoid packaging whose chemical composition is uncertain. Reducing tarnish formation helps reduce the need for future polishing.